|
By right clicking on each of the main areas within the options panel,
you can adjust the settings of each of the lights options. To
turn on shadow casting, click on the top icon on the right side of the
panel and hold down the mouse button - the panel will expand and you
can choose "Toggle shadow casting by current light". Once turned on, right click on
this icon,
and you can adjust how the shadow will appear; clean and crisp or faded
and rough. Ray Traced shadows
are more accurate than Mapped shadows, but their shadows are harder and
they take longer to render.
Most of these have their own options, so take your time and go through
each of the settings. Depending on how you setup your lights it can have
a major impact on rendering times. The use of some lights, Sky Lights
for example, by themselves will increase your render times, but some scenes
will require that level of realism, just be aware of this when you go
to hit the render button.
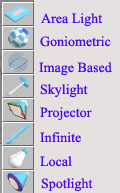
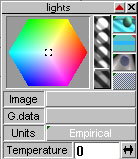
Another light to be cautious with is the Goniometric light. This requires
the use of the G-Data setting. This can be found at a number of lighting
manufacturers web sites. These setting describes how the light is cast,
or behaves. These lights can produce very accurate simulations of real
world lights and are great for architectural, or indoor renders.
Some of the render options will also have an effect on your lights. Ray
Tracing/Scan Line being just one of them. If you are attempting to render
realistic glass textures or transparencies, Ray Tracing is a MUST. Without
it, your objects will normally show up as pure black. There are also a
number of Post-Processing or Foreground effects which can be applied to
your lights: Lens Flair, Fog, Volumetric shadows, etc. These have to be
enabled both on the light itself and then in the Render options.
For volumetric lights, turn on
the volumetric options for the light in the options panel (only spotlights
and projector lights can have volumetric effects), and also enable
"Foreground Effects Shader - Simple Volumetric" in the Render
Options panel (the toolbar in the upper right of your screen). Right-click
on this icon to access the options for the volumetric effects. If your
volumetric light is going to shine through a transparent texture, enable
shadow casting for the light and set the shadow transparency to
"Transparent Shadows" in the shadows options.
To get a good lens flair, you would first place a spot light into your
scene. Have at least part of it pointing to your camera. Then turn on
the Lens Flair option on the light itself. Now right click on the render
icon and also enable the Glows & Lens Flairs Effects. When you render
your scene you should now see a lens flair around the light source.
By expanding the Glows & Lens Flairs options from the Render options,
you can also adjust how the flair will look in your scene, its effect
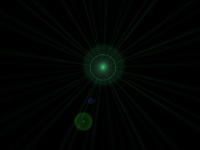
range, Ghosting, Rays, etc. Figure 9.3 is a single Spotlight, aimed just
below the standard perspective view. I have adjusted the color setting
toward the green side, enabled Lens Flairs, then have Ghosting set to
3, and Rays set to Random.
|